Split Personalities: Servicing and understanding two-piece MV wheels
Military Trader & Vehicles offers up a primer for working on two-piece MV wheels.
After about 60 years of working with, driving, rebuilding and repairing trucks and equipment, including several hundred military vehicles, I’ve heard many legends, stories and myths that go with the territory. As far as stories, there’s the one about four American soldiers in Vietnam who were driving along a narrow trail through rice paddies in an M151 when they suddenly came under enemy fire. There was no cover, no place wide enough to turn around and retreat, but the G.I.s jumped out, each grabbed a corner of the MUTT, and they lifted and turned it around. As the story goes, when they arrived back at base and told of their escape no one believed them — “four men cannot lift an M151.” And, when they tried to duplicate this feat, they couldn’t! I have no problem believing this, because there are many documented cases of mothers lifting massive objects like overturned cars or fallen trees to rescue their children.
In regard to legends, who hasn’t heard the one about “brand-new WWII jeeps in boxes for sale at $500 each?” (It used to be $50 when I was a kid, but we’ll allow for inflation.)
Many of us have also heard of someone who got their head ripped off when a split-rim tire they were changing blew its ring. This has perpetuated an unreasonable fear of split-rim wheels, which amounts to outright terror of multi-piece wheels for some folks.
However, that story is true. It has happened many times and, ironically, often to experienced professionals who work on such wheels for a living. Why do these accidents happen to professionals? Logic suggests the odds are much higher — repeated walks through a mine field are much more likely to end in disaster than a single foray — but constant repetition of any task can lead to eventual carelessness when performing it. For example, in the six years I drove an 18-wheeler I never once saw a split-rim tire put in a safety cage at any truck stop – though there were such cages on site -- and most of the time the tire-jockey used an ordinary air-chuck instead of a clamp-on type; and some actually stood or even sat on the tire as they inflated it.
A more correct name would be multi-piece wheels, but we’ll stay with split-rim in this article -- though please note there’s a definite
difference between a “split-rim” and a “split-RING” on a rim. There are about a dozen common types of split-rim wheels you’ll likely encounter in both
military and civilian use, and there are probably about a dozen others, oddballs and obsolete types, which you may also run across.
On the other hand, I have demounted and re-mounted hundreds of split-rim wheels of all sizes, starting when I was 13, from ordinary civilian style 7:50 x 16, 17 and 18 on pickups and light trucks, to the 9:00 x 16 of M-37s and WCs, and the 9:00 and 11:00 x 20 of deuce-and-a-halfs. Also, the common 10:00 x 20 of most heavy commercial trucks and busses, on up to some real monsters such as 24:00 x 72 on quarry trucks. I have done this under all conditions from the worst -- such as on my M-37 by the side of the road in Alaska, with no tools except a couple of big screwdrivers, a small sledge-hammer, a patch kit and a spark plug tire inflator -- to the best in a fully equipped tire shop with all the right equipment. I have worked on almost every type of split-rim wheel, from solids (or Budds) to spokes (or California wheels), and from the reputedly treacherous three-piece types to modern two-piece safety-rims. And not once have I ever had a wheel blow apart.
Maybe luck was involved to some degree, but I think caution, good healthy fear, and no shame about showing it has been more beneficial in keeping my head on my shoulders.
Have I been hurt? Sure -- and many more times than I care to recall -- but the injury was almost always caused by carelessness on my part, such as hitting my toes with the hammer or pinching my fingers in a tire bead or wheel rim and/or suffering various scrapes and cuts caused by impatient or improper use of the tire tools, or by using the wrong tools for the job. I’ve had many backaches caused by swinging the hammer or carelessly hefting big tires and wheels. Yet in all that time I have seen only one wheel even come close to blowing, and this was a three-piece whose lock ring was so badly rusted and sprung it was obvious after inflating the tire to only 10 pounds that it was never going to seat properly.
This may be the best bit of advice I can offer:-- ALWAYS INSPECT YOUR WHEEL COMPONENTS CAREFULLY, TAKE NO CHANCES, AND WATCH WHAT YOU’RE DOING AT ALL TIMES!
I mentioned in an article about repairing fuel tanks -- calling a fuel tank a bomb waiting to go off -- and if you regard a split-rim wheel as a armed bomb, and treat it as if you were a bomb-disposal expert, then mounting and repairing your own tires should be no more hazardous than hoisting an engine or working beneath a vehicle on jacks. If you follow this advice, your biggest worry will probably be a strained back -- which can usually be avoided by using proper lifting techniques.
I prefer to carefully examine all wheel components for proper fit and condition and then watch carefully, making sure everything seats how and where
it should as I inflate the tire. I have occasionally parked a vehicle over the wheel assembly whenever there was any uncertainty.
Another word of warning: although 10 psi (or even 45 psi, as suggested for M-37 tires) may not seem like a lot, consider that means POUNDS PER SQUARE INCH. Do the math and think about it.
Like many common terms in the world of vehicles, “split-rim wheels” is a general and technically misapplied description. A more correct name would be multi-piece wheels, but we’ll stay with split-rim in this article -- though please note there is a difference between a “split-rim” and a “split-RING” on a rim. There are about a dozen common types of split-rim wheels you’ll likely encounter in both military and civilian use, and there are probably about a dozen others, oddballs and obsolete types, which you may also run across. I’m not speaking of the bolt-together “combat” or “battle-rims” of WWII HMVs and today’s HMMWVs. If in good condition, bolt-together wheels are without a doubt the safest kind of multi-piece wheels.
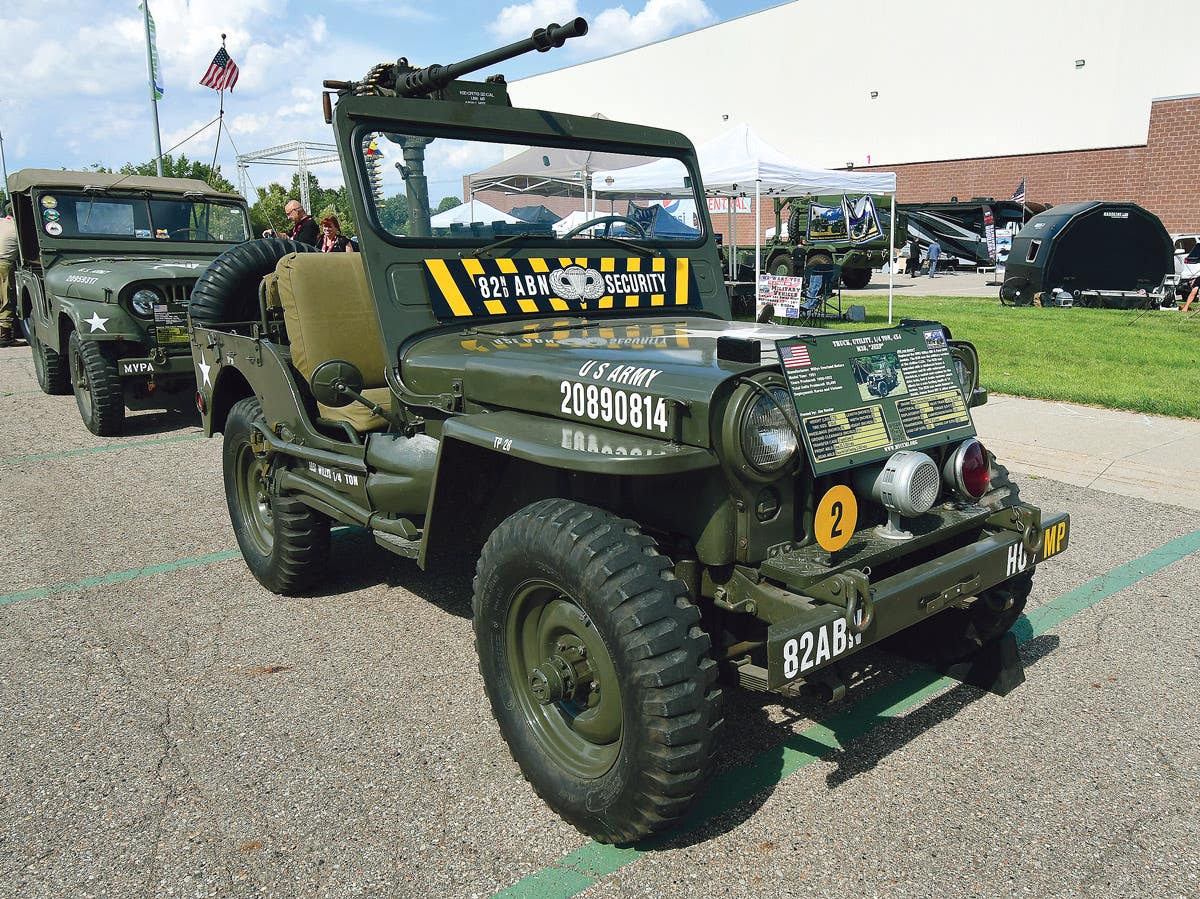
Unfortunately, removing and remounting tires on bolt-together wheels takes a lot of time, which is why they are seldom used in civilian applications except on heavy equipment. For U.S. military jeeps beginning with the M-38 and M-38A1 and on up to the M-151-A1 & A2, one-piece (or drop-center) wheels were used. For M-37s and M-715s fitted with 9:00 x 16 tires, the most common wheel is the two-piece 16-inch “Budd-type” with a split-RING. This wheel is also used on most 3/4-ton trailers.
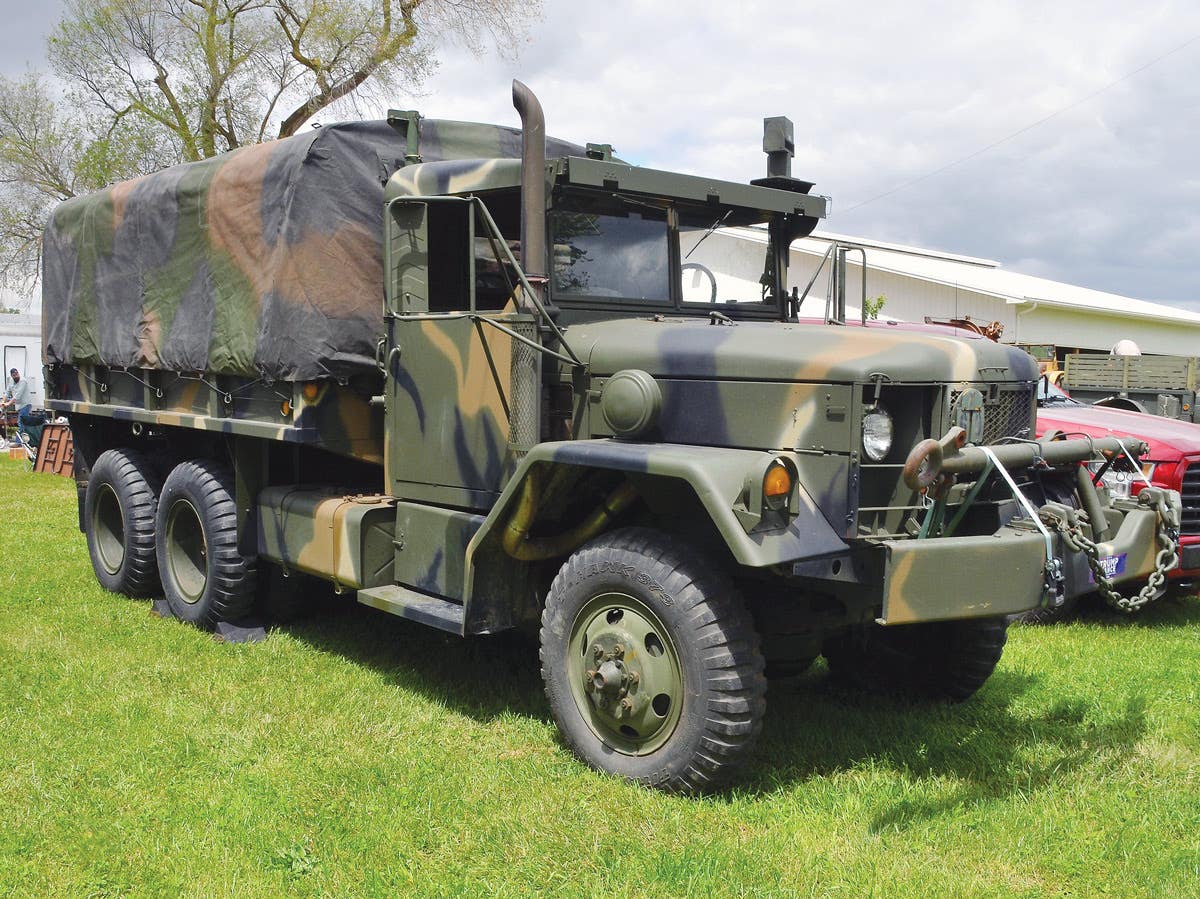
This type of two-piece split-ring “Budd wheel” is also used in a 20-inch size on most deuce-and-a-halfs (CCKWs, M-211s, M-35s, etc.) running either 9:00 x 20 or 11:00 x 20 tires, and it’s this type of wheel you’ll most likely encounter on HMVs using 20-inch tires. There are two other common types of 20-inch Budd-type wheels that may show up on deuce-and-a-half and larger U.S. military trucks, especially those which have already seen prior civilian service: these are the two-piece continuous side-ring wheel, which is also sometimes called a safety-rim or “Firestone wheel,” and the three-piece flat base. As already mentioned, there are many variations on these three basic designs, plus many smaller and larger multi-piece wheels used on military base trucks or GSA vehicles, but we don’t have the space to cover all of them.
Yet another word of warning is that because there are so many different variations on these three basic types of wheels it’s often tempting to mix the parts. NEVER, NEVER, NEVER do this! Close only counts in horseshoes and hand grenades, and to mix the various parts of one brand or style of split-rim wheel with another is to create a potential bomb. Be careful if you’re shopping for used wheels in wrecking yards — especially wheels without tires mounted on them — because it’s common to find mixed parts in these situations. Some wheels may have a manufacturer’s name on all the parts, but many more don’t; and even if they do it’s still no guarantee that the parts are all from the same series or model of wheel. These differences can very slight, so if you have any doubts, do not buy the wheel. And though it’s safer to buy used wheels that have tires mounted and inflated on them — even if this leaves you with a junk tire to dispose of — you still can’t be certain that all the parts are correct for the wheel. Even slight differences can be potentially deadly, so always thoroughly clean and inspect all the components for proper fit before re-mounting a tire on a wheel. Likewise, always check to be sure that a split or lock-ring hasn’t been sprung, cracked, or bent out of shape — usually by overzealous application of a tire hammer or the use of improper tools.
Tools for the job
This brings us to the proper tools for the job; and this is one area of HMV service and repair in which you MUST have the proper tools!
First and foremost, you must have a tire hammer. There are several types and sizes, but the best for all-around use is the biggest and heaviest, which is a full-size sledge-hammer type. There are also slide-hammer types, which are easier on one’s back. However, if you only have an M-37 or WC with 16-inch wheels, you can generally get away with a smaller hammer. In either case, pay a little more for a fiberglass handle instead of a wooden one, because do-it-yourselfers are often hard on the handle where it joins the head. Good quality hammers often have a rubber pad around the handle in this area.
You must also have that long “crowbar-looking-thing.” And A REGULAR CROWBAR, NO MATTER WHAT SIZE, WILL NOT WORK FOR ANY PHASE OF CHANGING SPLIT-RIM TIRES! Neither will that mechanic’s pry bar and alignment tool you may have. Go ahead, be stubborn, and find out for yourself. Forget screwdrivers, too; you’ll only break them no matter how large, as well as possibly cutting your tire beads and punching holes in your tubes.
You should also have a minimum of two tire bars or spoons. And you’ll need a valve-core remover tool. Plan on spending about $100 for all these basic items, unless you get lucky at a flea market or on eBay. Of course, there are power tools to do many tire-changing tasks, but that may be too much of an investment unless you have a lot of wheels to service. Do you need a safety-cage? There’s no doubt that having one would be the ultimate in safety, although I’ve never used one myself. I prefer to carefully examine all wheel components for proper fit and condition and then to watch carefully, making sure everything seats how and where it should as I inflate the tire. I have occasionally parked a vehicle over the wheel assembly whenever there was any uncertainty. We’ll get to ways of inflating your tires in relative safety, and things to watch as you do; but here’s a basic disclaimer that just because I do things a certain way does not mean I’m advising you to do the same, so put on your big-boy pants and take responsibility for your own actions and decisions.
This brings us to the last special tool you’ll need for this job, which is a clamp-on type air chuck and some arrangement with your air hose that will allow you to inflate your tire from a safe distance while monitoring the air pressure. This shouldn’t be hard to figure out or expensive to make.
It’s also up to you about wearing safety goggles, but rust and paint chips do fly, and compressed air blows things around. You may want to buy some rubber lube to make things slip and slide easier, though a mix of ordinary dish-washing detergent and water will work just as well… and is what most tire shops use. A paint brush will work to slather it on.
How to do it yourself
Ready? Okay, let’s go through a basic de-mount and remount procedure for a two-piece flat base 20-inch wheel, which seems to be the most common type on deuce-and-a-halfs. This is also the procedure you would use for most 16-inch M-37 wheels. We’ll assume you’re replacing the tire with another, because patching tubes is an article by itself. We’ll also assume you’ve already taken the wheel off your vehicle, and that it seems to be in good condition and not severely rusted.
The first thing to check is that the lug bolt holes haven’t been wallowed out from the wheel running loose. If they have, throw the wheel away. There’s no shortage of this type wheel, and it’s foolish to use one that isn’t in good condition. The next thing to look for is that there aren’t any cracks radiating out from the lug bolt holes, and you may have to scrape off many layers of old paint to make this examination. If there are cracks, even a little one, throw the wheel away. Don’t try to weld it; you’ll only weaken and probably distort the wheel; and a responsible person would somehow mark or further damage the wheel so it’s obvious to anyone it shouldn’t be used again.
If your wheel passes this preliminary exam, use your valve tool to remove the valve core and let all the air out. Take note of which way the valve stem faces — usually toward the front side or dome of the wheel. After the tire is deflated, lay it down with the front side — the side with the ring -—- facing up. Liberally slather the tire all the way around the ring with your rubber lube or soap-and-water mix.
Position yourself as shown in the illustration, and swing the hammer so that its curved head strikes and wedges between the tire and the lock ring, which should separate and break the tire down and away from the ring. Work all the way around the tire. Got soap in your eyes? You should have worn goggles. Just as when swinging a pick, let the hammer do the work and save your back. Try not to beat on the ring any more than absolutely necessary or you might bend or spring it out of shape, and there goes the wheel.
After the tire has been broken away from the ring all the way around, take your rim tool — the crowbar that isn’t — and further work the tire down and away from the ring. Then take your pry bar — the one with the wedge head and groove —- insert it into the notch on the ring and pry the ring up and off the wheel. The ring is springy, so take care it doesn’t pop suddenly free and bop you.
Now turn the wheel over, soap the tire again on the up side, and repeat your hammer work to break the tire down and off the wheel. It’s handy to have a wooden block to raise the wheel a little way off the ground when you do this so the tire slides down and off more easily. Once the tire is loose, carefully pull it off the wheel while guiding the valve stem clear.
This is the way it should have worked. You may sometimes run into a tire that has rusted onto the wheel, and it will be a real joy to remove. I once encountered a tire that had been on its wheel so long I finally had to cut it off with a saw; but about the only other advice I can give about that sort of situation is to hold your temper and keep working calmly with the hammer and soap, and eventually the tire should come off.
are without a doubt the safest kind of multi-piece wheels. Unfortunately, removing and remounting tires on bolt-together wheels takes a lot of time,
which is why they are seldom used in civilian applications except on heavy equipment.
Examine the inner surface of the wheel, and pay attention to the lock ring groove. If the wheel is badly rusted and pitted, especially around the groove, to the point where proper fit of the lock ring or the structural strength of the locking lip might be compromised, throw the wheel away. Likewise for the lock ring. Ring and wheel should always be discarded together. Light rust and scale can be sanded or wire-brushed off, and the lock ring and its wheel groove should be thoroughly cleaned. It’s a good idea to pop the ring back onto the wheel and check for a good snug fit.
Also thoroughly clean the tube flap of any rust or scale that might be clinging to or imbedded in it.
Although as mentioned earlier, the repair and/or patching of tires is an article all by itself; since the tire is off it would be a good idea to check the tube and flap before remounting it.
The purpose of the flap seems to puzzle some people, but it’s not an optional item. The flap is used to prevent the tube from chafing on the wheel, and if you don’t install a flap your tube will quickly blow out, sometimes after only a few miles on the road.
You should remove both the tube and the flap from the tire whenever you have a tire off the wheel and give them a careful examination. If the flap is very old and stiff or rotted and falling apart, replace it with a new one. New flaps used to come with new tires, but a visit to most truck tire shops will usually score you a good used flap. Naturally it should be as much like the original flap as you can find. Even if your flap seems in good shape, check it for cracks, tears or creases that might pinch or cut the tube. It’s common for the flap to be torn or cracked around the slot or hole where the tube’s valve stem goes through. If so, replace the flap.
You should also check the tube to make sure it’s not so old and rotten it’s liable to blow any time. Don’t let a few patches scare you -- if done properly, patches are perfectly safe and won’t weaken the tube or make it a risk factor in the reliability of your vehicle. Pay attention to where the valve stem is attached: a little rust is nothing to worry about, though it should be carefully removed — don’t scrape or dig— but be sure the rubber hasn’t rotted or cracked around the valve stem. Also make sure the tube doesn’t have any deep creases or folds. These are usually caused by someone installing a tube that’s too large for the tire — such as a 9:00 x 20 tube in an 8:25 or 7:50 x 20 tire, or a tube that was originally too small for its tire but was stretched by installing it anyway, and which now may be too big for the tire you want to use it in. Just like everything else, the quality of new tubes varies widely by brand and price, and even big-name tubes have relatively fragile valve stems compared to the ones of fifty years ago, so shop carefully.
If your tube seems in good shape but you suspect it may be weak around the valve stem, there are special patches that can strengthen it. If buying a new tube, compare the thickness, weight and feel of its rubber to your old one. If it feels flimsy it probably is. If the valve stem looks fragile or doesn’t fairly well match the style or length of your old one, shop somewhere else. In the case of smaller truck wheels, one used to be able to bend a valve stem if it was too long for the application, but the valve stems on today’s tubes seem a lot weaker and more prone to breaking when bent, while a long valve stem sticking straight out is a flat tire waiting to happen.
Lastly, don’t be talked into buying a smaller tube for your tire “because it will stretch.” It will stretch, and get thinner and weaker as it does. And while some tubes are designed to fit several different tire sizes, such as 7:00 x 16 and 7:50 x 16, make sure it says so on the tube itself. There are no tubes designed to fit different size wheels: for instance a 16-inch tube will not work on a 17-inch wheel, or vice-versa; at least not for very long.
Always clean the inside of your tire, removing any dirt, rust-scale and small objects like imbedded pebbles before re-installing the tube. Run your hand carefully all around the inside of the tire to feel for such things. If there’s a frayed spot in the tire, or the cords have come loose like dangling strings, you may have to replace the tire unless you’re only using the vehicle for show and short no-load trips. It’s your call, but if a tire is starting to come apart inside, total failure isn’t far off.
Should you paint the inside of the wheel? That’s also your choice; but if you do, make sure the paint is absolutely dry before remounting the tire, or you may be sawing the tire off next time around.
When all has been examined and cleaned, and the tube and flap re-installed in the tire, lay the wheel down with the dome facing up, slather the tire bead --where it goes on the wheel -- with rubber lube or soap and water, and slip it onto the rim, taking care to guide the valve stem into proper position. Again, a wooden block might be handy to raise the wheel off the ground so the tire can be pushed all the way down, leaving room to install the lock ring. Then start the ring into its groove and work it into place all the way around. It’s OK to tap on the ring with a hammer. You can also stand on the ring and walk it into place.
Check to make sure the ring is properly seated, then, without installing the valve core, air up the tire to about 10 psi while carefully watching as it expands and seats the lock ring in its groove. This is the most critical part of the operation… now is the time you’ll see if the ring is sprung or bent so it won’t seat properly. Sometimes some light tapping with your hammer will seat it, but if you have any doubts, the bottom line for safety is to demount the tire and get another wheel.
If all seems well at this point, let the tire deflate, make a final check to be sure the valve stem is in its correct position and not cocked at an angle, install the valve core, and again inflate the tire to 10 psi while watching to make sure the lock ring is still firmly and properly seated. Again, a few light taps here and there should do the trick. By the way, 10 psi is still enough to blow the ring off with sufficient force to break your nose or knock a tooth out, so don’t get careless.
Again, if all seems well, clamp on your air chuck and prepare to inflate the tire to its full recommended pressure. And, again, a stout safety cage would provide the ultimate in safety. Alternatively, you could park a vehicle over the wheel. Keep in mind that distance alone is no guarantee of safety -- lock rings usually blow straight up, but they can sometimes take off sideways.
If the recommended pressure for your tire is 80 psi, first inflate it to 40 and make another cautious examination of the lock ring. It should look no different now than it did at 10 psi. Then go ahead and inflate to 80 and make a final cautious inspection of the ring. Chances are excellent that all is well, so you can now go ahead and remount the wheel on your vehicle.
If you’ve installed a replacement tire, it may have to be balanced.
This de-mount and remount procedure is essentially the same for most three-piece wheels, except you have three components to examine, fit and watch. You may start feeling confident that changing split-rim wheels is really no big deal, just beware that your new-found confidence doesn’t lead to dangerous carelessness.
Looking form more handy tips? Here are a few more articles for your reading enjoyment.