Does Your Historic Military Vehicle “Dance?” on the Road?
This article will help you diagnose and cure your Jeep or larger military vehicle of the “shimmy”
One of the most common problems on older military vehicles is front end shimmy, which is why we offer articles about it from time to time. Most folks who have owned or driven vintage military vehicles and other all-wheel-drive trucks have probably experienced some form of front axle shimmy. The degree of shimmy can range from a minor front wheel wobble after hitting a hole in the road or crossing railway tracks to a shaking sensation that tends to occur at certain speeds but disappears as one either accelerates or slows the vehicle down. An extreme case of shimmy can be a terrifying ordeal if one has never experienced a shimmy before, and this may apply to many new members of the hobby.
Most veterans of shimmy develop tricks to ward off the shimmy gremlins, such as jamming down hard on the brakes or yanking the steering wheel from side to side as if fighting back at whatever seems to be attacking the vehicle. In the case of an M211 I once owned, the only thing that worked was to bring the truck to a complete stop.
Aside from being a scary ordeal, can shimmy do any actual damage to a vehicle? YES! And not just in extreme cases. Even the most minor degree of front end shimmy, including an occasional wobble after crossing railway tracks, can grow into a much more serious problem if allowed to continue or not corrected.
SHIMMY DOES NOT DISCRIMINATE
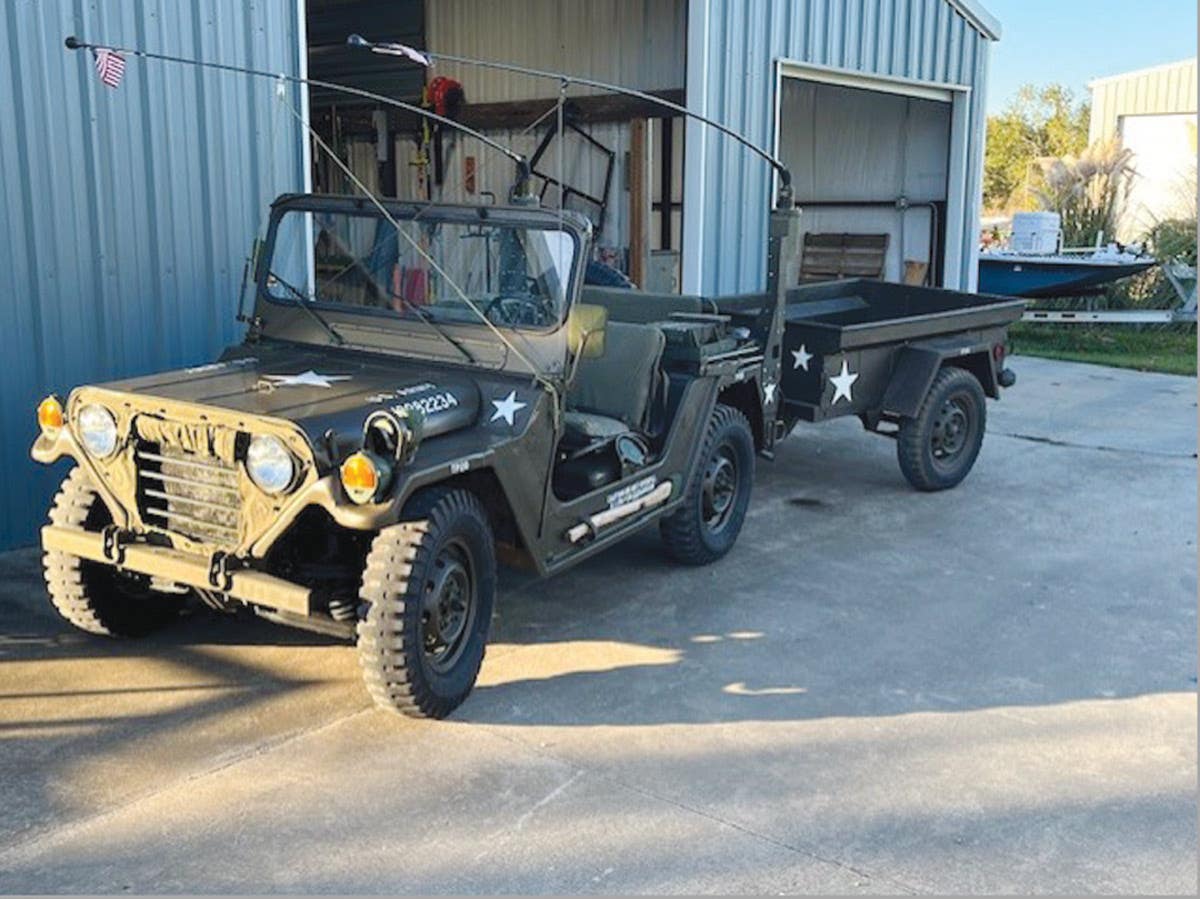
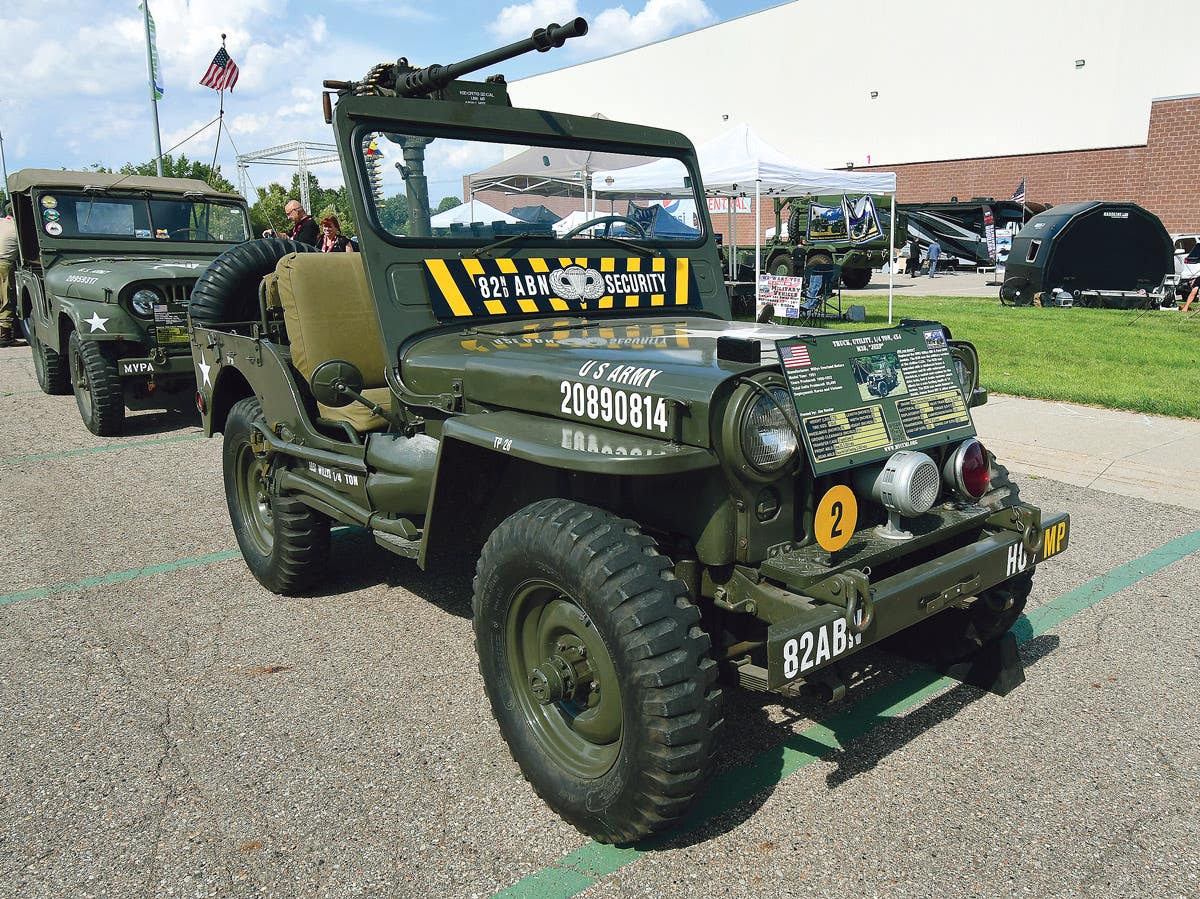
While jeeps usually come to mind as the most common victims, shimmy shows no preference for any particular vehicle type or size and can occur just as easily on an M52 as an M38. However, many jeeps have what could be called a design flaw that does make them more prone to shimmy, and we’ll discuss that later.
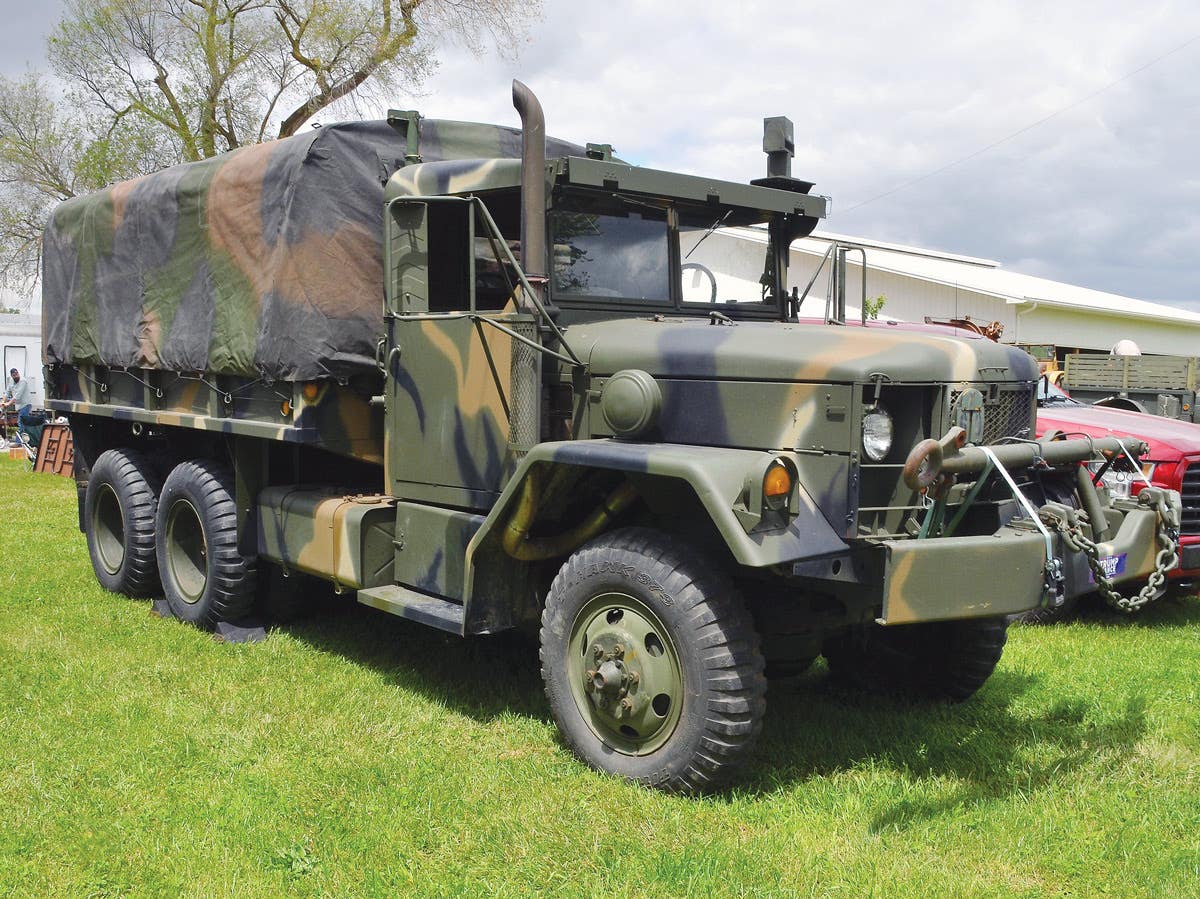
It might seem that large trucks are more immune to shimmy, but that’s mostly because of the sheer size of their front axle and steering components; and in the case of most heavy WWII and early M-series vehicles, they’re relatively low mileage compared to their commercial counterparts. But even half-tracks have been known to shimmy.
In this article, we’re going to investigate every probable cause of front axle shimmy, as well as learn all the cures. This might sound a bit ambitious if you’re one of those frustrated individuals who has already tried everything to fix your problem. However, you haven’t really tried everything if your vehicle still shimmies.
START WITH THE CHEAPEST FIX
While many times front axle shimmy is relatively easy and inexpensive to cure, in other cases it may require extensive repairs and parts replacement. We will start with the simple and cheap things first and move on to the more complicated and expensive ones. It’s best to follow the suggested steps in a logical order and not skip haphazardly around.
It’s sometimes tempting to rely on intuition, especially if one has already put a lot of time and effort into trying to fix a shimmy problem, but by not thinking of a vehicle’s entire front axle, steering and suspension components as a complete unit, one may have actually made—or might make—the problem worse with random repairs, parts replacement, or guessing at adjustments. Another complication is that there is often more than a single cause of front axle shimmy, so by following the component chain step-by-step, one may be able to avoid the time and expense of replacing perfectly good parts.
First, what is front axle shimmy? Basically it’s an increasing cycle when, perhaps from crossing railway tracks or hitting a hole in the road, a vehicle’s front wheels are jerked to one side. However, instead of recovering to a straight-ahead position, the wheels go past center in the opposite direction, only to be jerked back to the other side even farther. This cycle may increase in violence and frequency until something may actually break. In such cases, yanking the steering wheel side to side, slamming on the brakes, or bringing the vehicle to a stop usually breaks the cycle and the shimmy disappears.
The thing to note is that the vehicle’s wheels didn’t normally recover from the first jolt to a straight-ahead position and stay there, but went on past. This is generally caused by loose or worn-out front end and/or steering system components. Many historic military vehicles (HMVs) already have front axles and steering systems that are worn to the point where shimmy could happen, but the right combination of circumstances have not yet occurred to make it happen.
Likewise, there may be factors on a vehicle that are trying to cause a shimmy, but the front end components are still too healthy to allow it. Ideally, a vehicle’s front axle and steering system should be maintained in a condition where they are not only tight enough to resist shimmy, but also have no lurking factors to cause it.
CASTER, CAMBER AND TOE-IN
To begin, one should make themselves familiar with the meaning of the terms, CASTER, CAMBER and TOE-IN. Let’s go over each one to find out what it means and how it applies to the health of a vehicle’s front axle.
For almost all common collector military vehicles, caster and camber were built in at the factory and meant to be permanent for the life of the vehicle; though it’s doubtful if the designers ever imagined that so many WWII, Cold War, and Vietnam-era vehicles would survive into the next millennium.
Age, abuse, normal wear, and modifications may have changed the caster and camber, so one may have to restore them to original factory specs, and sometimes this isn’t easy. On the other hand, toe-in is easily adjustable, though whether the adjustments will do any good at preventing shimmy will depend upon the condition of a vehicle’s front end and steering components. Even the most precise laser alignment at a high-tech shop won’t help if a vehicle’s steering parts are worn out.
None of the repairs are beyond the scope of most home mechanics with good basic tool sets and the knowledge and skills to perform something on the level of a brake job. And with careful shopping, even a major overhaul on an M35’s front end shouldn’t cost more than a new set of canvas.
CASTER is the angle, measured in degrees, that the steering-knuckle pivot points are tilted away from vertical when viewed from the side of the vehicle. Why are they tilted... or “castered?”
Caster tends to keep the front wheels pointed straight ahead in relation to the vehicle as they roll down the road. caster is also one of the reasons a steering system tries to retain a straight-ahead position and the front wheels want to recover to straight-ahead after making a turn. Why? Because turning a set of castered wheels raises the front of the vehicle slightly, and that weight pushing down helps the wheels return to a straight-ahead position. ...Simple gravity. Likewise, this tends to keep the wheels pointed straight ahead, because turning the wheels means they must lift the front of the vehicle.
Without caster, a vehicle would wander all over the road, and it would be next to impossible to let go of the steering wheel even for a moment. Not only that, but one would have to steer the vehicle back into a straight line every time it turned a corner. Assuming your vehicle doesn’t have power steering and that its front end components are in good shape and properly adjusted, you should find that after making a turn on a hard level surface you can let go of the steering wheel and the front wheels will straighten out by themselves.
As already mentioned, caster is built into most vehicles at the factory, either by the angle at which the spring pads are welded to the axle housing, or sometimes by wedges installed between the spring pads and the springs. Almost all road vehicles have “positive caster.” This means that the upper pivot point is farther back toward the rear of the vehicle than the lower pivot.
The degree of caster usually ranges between one and three. For older HMVs, changes in caster are usually caused by worn out steering-knuckle pivot bearings and/or pins, though damaged leaf springs can also change the degree of caster. It’s quite common to mess up caster when someone modifies a vehicle’s suspension system or remounts the axles from above to below the springs... which usually entails cutting off then rewelding the spring pads.
If one plans to do such a modification, pay very careful attention to caster or one may end up with a vehicle that is hard to control or even dangerous because it won’t stay in a straight line and doesn’t want to recover from turns. Likewise, if one contemplates buying a vehicle that has been modified in this way, be sure to drive it first. Incidentally, wide tires compound problems caused by incorrect caster.
While caster itself isn’t generally a big factor in allowing shimmy to occur, we now know that incorrect caster can cause a vehicle to wander, making it tiring to drive, and in extreme cases may even be dangerous. However, caster settings go hand-in-hand with the second built-in feature of your HMV’s front axle: that of camber.
As with caster, some people might be surprised to learn that not only are their steering-knuckle pivots tilted back toward the rear of the vehicle, but they are also tilted slightly outward, or away from the center of the vehicle. To put it another way, the bottoms of the front tires are closer together than the tops of the tires. This is called CAMBER.
The degree of camber is usually around three, though it may be more noticeable on vehicles such as flat-fender jeeps, CCKWs or G506s with narrow tires and where the entire wheel can be seen from the front. Camber used to be even greater than three degrees on older trucks and cars because this made steering easier on the high-crowned roads of the 1920’s, especially for vehicles with narrow or solid tires.
For modern, flatter highways and with today’s wider tires, less camber is needed. Still, an HMV’s front end was designed a specific way, and whether the design is obsolete or not, it must be kept to factory specs or the vehicle won’t behave as it should.
Incorrect camber can play a big part in allowing shimmy to occur and/or the vehicle to wander, especially since improper camber is almost always caused by worn-out steering-knuckle pivot bearings and pins. Badly worn or loose wheel bearings, or a bent axle housing can also alter camber... the former to a minor degree, while the latter is fairly rare. On most HMVs, replacing the pivot bearings will restore, or at least improve, both camber and caster.
The third important factor of basic front end alignment is toe-in. We now know that a vehicle’s steering-knuckle pivot points are castered (tilted backward from vertical) and its front wheels are cambered (tilted outward at the top) but we also find that a vehicle’s front wheels are “toed-in.” That is, closer together in front than at the rear.
TOE-IN is meant to balance the effects of camber. While we know that camber is important for steering control, the problem is that a set of cambered wheels want to roll away from each other. Confused? Set two dinner plates on edge with their convex sides facing out and roll them off together. One goes east while the other heads west. If they continue rolling long enough they will circle around in opposite directions and bump into each other. Not the way a vehicle’s front wheels should behave! So, the effect caused by camber is balanced by toe-in.
Toe-in must balance camber. Too much of one or too little of the other affects how a vehicle handles and steers. If just one of the three factors of caster, camber or toe-in is incorrect, it affects the other two, which affects the performance of the vehicle, which in turn affects our attitude about the vehicle. It’s not a pleasant experience to drive a vehicle that fights its driver and wanders or darts all over the road. Much less pleasant if it also shimmies!
Toe-in is also a factor in helping a vehicle recover to a straight line after making a turn. However, too much toe-in can make a vehicle reluctant to turn. Incorrect toe-in also wears out tires by forcing them to scuff along the pavement. Toe-in out of adjustment by as little as half an inch can make front tires drag about 90 feet per mile. Imagine a 90-foot skid mark for every mile traveled!
A bent tie-rod will effect toe-in and tire wear. If the rod is located in front of the axle, it pulls the front of the wheels closer together, causing too much toe-in. This scuffs the tread on the outside of the tires. On the other hand, if the rod is located behind the axle, it pulls the rear of the wheels closer together, which spreads the tires out so they scuff on the inside. Most tie-rods can be easily straightened without removal by using a bottle jack... and this is one of the first things one should check. But, make sure you know the difference between a tie-rod that is actually bent and one that has factory bends to clear the differential or other components.
Of the three basic factors of front end design that, in itself, would be most likely to cause or allow a vehicle to shimmy, toe-in is number one. This is fortunate because toe-in also the easiest thing to fix.
Toe-in is adjustable by lengthening or shortening the tie-rod. Some tie rods have both left and right hand threads on their ends, which means that one can adjust the rod without removing the ball joints by loosening both clamps and using a pipe wrench to turn the rod. On other tie-rods, one may have to remove one of the ball joints with a “pickle fork” to make the adjustment. Most early model jeeps have two tie-rods and this adjustment can be tricky, so it’s best to have a manual. However, any adjustments, whether made at home or in an alignment shop, aren’t going to do much—if any—good if a vehicle’s front-end components are worn out.
To recap, incorrect settings of caster, camber and toe-in, along with the condition of other front axle and steering parts, are almost always the primary factors that allow a vehicle to shimmy. You may have noticed that we’ve been exploring factors that allow a vehicle to shimmy, not what causes the shimmy.
The causes are pretty simple.
DON’T LOSE YOUR BALANCE
Wheel balance is at the top of the list. For instance, if a vehicle always seems to start shaking at a certain speed, it’s a pretty safe bet that one or both of its front wheels are out of balance... and don’t forget the rear wheels. Unbalanced wheels, front or rear, are one of the most common things that can set off a shimmy. Have your wheels balanced by a reputable shop, and keep them clean, both front and backside, to prevent globs of mud or grease from building up. It doesn’t take much of either to throw a jeep or MUTT wheel out of balance.
Old tires, especially on vehicles that have sat for years without moving, can set off a shimmy because they may have flat spots. Under-inflated tires can also make a vehicle shimmy.
Bent wheels that wobble can be worse than wheels out of balance. Besides setting off a shimmy, bent wheels are hard on wheel bearings and axle shafts, even on trailers. There is no effective way to straighten a bent wheel—though some folks will try—so discard and preferably destroy it so that a fellow military vehicle enthusiast doesn’t end up with it. Only a jerk would knowingly sell a bent wheel!
Check your wheel bearings for proper adjustment. Besides affecting camber, loose or worn-out bearings can allow your wheels to wobble and your vehicle to wander.
These are some of the things that can cause front-axle shimmy. Most are fairly easy and inexpensive to fix. No matter what shape your HMV’s front end is in—or you think it’s in—if it shimmies, check for wheel balance, bent wheels and loose wheel bearings first.
THERE IS “GOOD” SHIMMY
Now we’ll move on to the factors that allow shimmy to happen. The main reason we need to fix these things is because they will let shimmy occur from hitting a hole or crossing railway tracks, even if your wheels are straight and properly balanced. Normal road hazards are hard to avoid, so the best thing to do is to restore your vehicle’s front end back to where it can simply shrug them off.
Illustrated throughout this article are some typical HMV front-end components. While space prevents showing every type, most larger common HMVs differ mainly in size. Note that a typical jeep front end usually has two tie-rods. This is a design factor that makes jeeps more prone to shimmy than other common HMVs. However, if a jeep’s front end is properly maintained and its wheels are straight and balanced, then it’s just as able to shrug off shimmy as any other vehicle.
Take all the necessary safety precautions when inspecting and working on your vehicle’s front end; such as blocking the rear wheels and using adequate jacks and supports. Never use cinder blocks, bricks or stones because they can crumble unexpectedly. And remember that those jack stands you bought for your M38 probably aren’t adequate for your M35! We don’t have the space to show how to replace every front end component, but all these procedures are covered in your vehicle’s manual...Buy one.
The first step is to give your vehicle a complete front-end inspection. This is done by jacking the front wheels off the ground with the jacks on the vehicle’s fame or front bumper so the whole front axle assembly hangs from its springs. Block the vehicle well because you will be doing a lot of moving and shaking. What you are checking for is looseness or too much play in everything that turns, twists or moves in any way, from the wheel bearings all the way back to the steering box. Start by grabbing a front wheel and shaking it to check for loose wheel bearings. If they are indeed loose, then tighten and maybe service them now.
The designed-in factors of caster and camber are mostly maintained by the steering-knuckle pivots. On many jeeps, the pivot bearings are simple bronze bushings, while larger HMVs usually have tapered roller bearings. Many HMVs have shims to adjust the clearance of these bearings. and here is where a manual is imperative.
To check the condition of the pivot bearings, point the wheels straight ahead, then grab the bottom of each tire from the side and try to shake the whole wheel and hub assembly just as you did when checking the wheel bearings. Any looseness in the steering-knuckle pivots should be apparent. There should be none.
Even if they seemed tight in this first test, get a helper to turn the steering wheel. Watch each knuckle while the steering is run through a full cycle from one side to the other and brought firmly against the stops both ways. Pay close attention to what happens when the knuckles reach the end of their travel: the steering knuckle should not appear to rise or lift, even slightly, when it bottoms out against its stop.
Sometimes, even if the pivots seemed solid when you did the shake test, you will still find looseness in this second test. If you do find looseness, you will need to replace or adjust those pivot bearings. This is the second step in curing shimmy; and, once again, if you don’t follow these steps in order you may not solve the problem.
The third step in shimmy-proofing your vehicle is checking the tie-rod ends. While there is really only one “tie-rod” (or two on most older jeeps) I’m using “tie-rod end” as a generic term for any of those linkage rod ends, except for the drag-link. A scan of the illustrations should make this clear.
By grabbing the wheels and trying to turn the steering system by pushing or pulling on them, plus having your helper again run the steering through complete cycles while you watch, you should be able to spot any looseness or slop in these ends. The condition of the tie-rod ends is vital to maintaining proper toe-in and preventing shimmy.
Unless these ends are tight, toe-in adjustment is useless, and your vehicle will probably shimmy, as well as wander and dart all over the road. Replace or tighten all loose tie-rod ends, and always keep them well lubed.
Most jeeps, with their two-piece tie-rod system, have a steering-linkage pivot (bellcrank) on the frame beneath the radiator. Most WWII jeeps have this pivot and bellcrank on the front axle. Any looseness or slop in this pivot will allow the vehicle to shimmy.
By shaking the wheels and running the steering back and forth, you’ll be able to find any looseness in this pivot. Watch to see if the bellcrank wobbles on its shaft or moves up and down. If it does, then rebuild or replace it, preferably with a complete kit that includes a new bell-crank. Some HMVs, such the M37 and its variants, have their own version of this extra pivot point. If so, check it and, if necessary, fix it.
Now check the drag-link ends in the same way you checked the tie-rod ends. Most drag-link ends are adjustable for wear. This is done by removing the cotter pin and using a large screwdriver or a special socket on the adjusting “plug.” On very old or hard-used HMVs, it’s a good idea to remove the drag-link and inspect the balls on the ends of the pitman and steering-knuckle arms. These balls are usually part of the arm itself, necessitating replacement of the whole thing. It is not a good idea to try to build up a worn ball by welding more metal onto it, because heat can affect the part’s strength. Besides, none of these components are very expensive or especially hard to find in the HMV world.
STILL SHIMMIES? MOVE ON TO THE STEERING BOX
Thus far, we have inspected all the moving points in our front end and steering systems back to the steering box. Generally speaking, if the rest of your front end is in good shape— or you have repaired it—then looseness in the steering box won’t be a big factor in allowing your vehicle to shimmy. However, slack in the steering box will allow your vehicle to wander and increase driver fatigue.
Checking the steering box slack is obvious. Too much play in the steering wheel before moving the front wheels is the indicator. Some adjustment can be made, but if the box is badly worn it should be replaced or rebuilt.
Most steering boxes use gear oil, and should be checked and topped off every time you do a lube job. If the pitman arm shaft seal is leaking, replace it. Make sure that the steering box mounting bolts are firmly attached to the frame and check the frame itself for cracks or loose rivets. Steering box adjustment procedures are covered in your vehicle’s manual.
SHACKLES AND HANGERS
The next front-end parts to check are the spring shackles and hangers. Again, give the whole front axle assembly a good healthy shaking. Spring shackles and hanger pivots should only move up and down, not wobble or shift side to side. While spring shackles and hangers aren’t usually a big factor in allowing a vehicle to shimmy, they can allow it to wander, so replace any worn-out parts now.
Check for looseness in your shock absorber mounts. Tighten and/or replace worn-out shocks, whether telescoping or knee-action types.
PARTS THAT SHOULDN’T MOVE
Lastly, we come to front-end components that shouldn’t move, such as spring pads, U-bolts, and other parts that secure the axle to the springs. All of these must be tight and secure. Check the vehicle’s frame for cracks or loose rivets on or around the spring mounts.
While there can be a lot of work and expense involved in repairing or replacing all these items, this must be done if you want to get rid of shimmy. By allowing shimmy to happen or continue, you’re only adding to the inconvenience, expense and real danger that lurks farther down the road. Shimmy puts a serious strain on all your vehicle’s front-end components, and if you’re operating your HMV in an unsafe condition, it will only get more unsafe until one day you may meet the mother of all shimmies and lose your steering or even a wheel.
Finally, there’s an often-asked question as to whether or not those add-on “steering stabilizers,” usually sold as 4x4 accessories, will help stop shimmy? The answer is: Sometimes. However, besides looking out of place on most HMVs, these telescoping shock absorbers actually do nothing except mask the real problems—loose or worn-out front-end components. They don’t fix any of the conditions that allow shimmy to happen. While they can sometimes prevent shimmy, the underlying problems will only get worse until even the stabilizer can’t stop a shimmy from happening. Better to fix your problems than to cover them up. Only that will stop the shimmy once and for all!
You may also enjoy
*As an Amazon Associate, Military Trader / Military Vehicles earns from qualifying purchases.