Military Vehicles 101: Lighting Systems
Shining Some Light on MV Lighting Systems
Many American baby-boomers who grew up to be just the right ages to serve in the military during the Vietnam War era may recall Jimmie singing on the Mickey Mouse Club TV show that “proverbs help us all become better Mouseketeers.” Even if one doesn’t belong to this generation, they may have heard the proverb: “Experience is the best teacher.”
While proverbs can be good advice, they may also have a dark side if blindly accepted and followed without question. For example, “Ignorance is bliss” doesn’t apply to leading a patrol through a minefield. Similarly, many proverbs have exact opposites that are just as often quoted. For instance, if “He who hesitates is lost,” then why “Look before you leap.” While experience may indeed be the best teacher, learning only from experience can also waste a lot of time, cause many needless problems, and may even put one in danger.
A BEFORE CLASS: TALE OF MY OWN
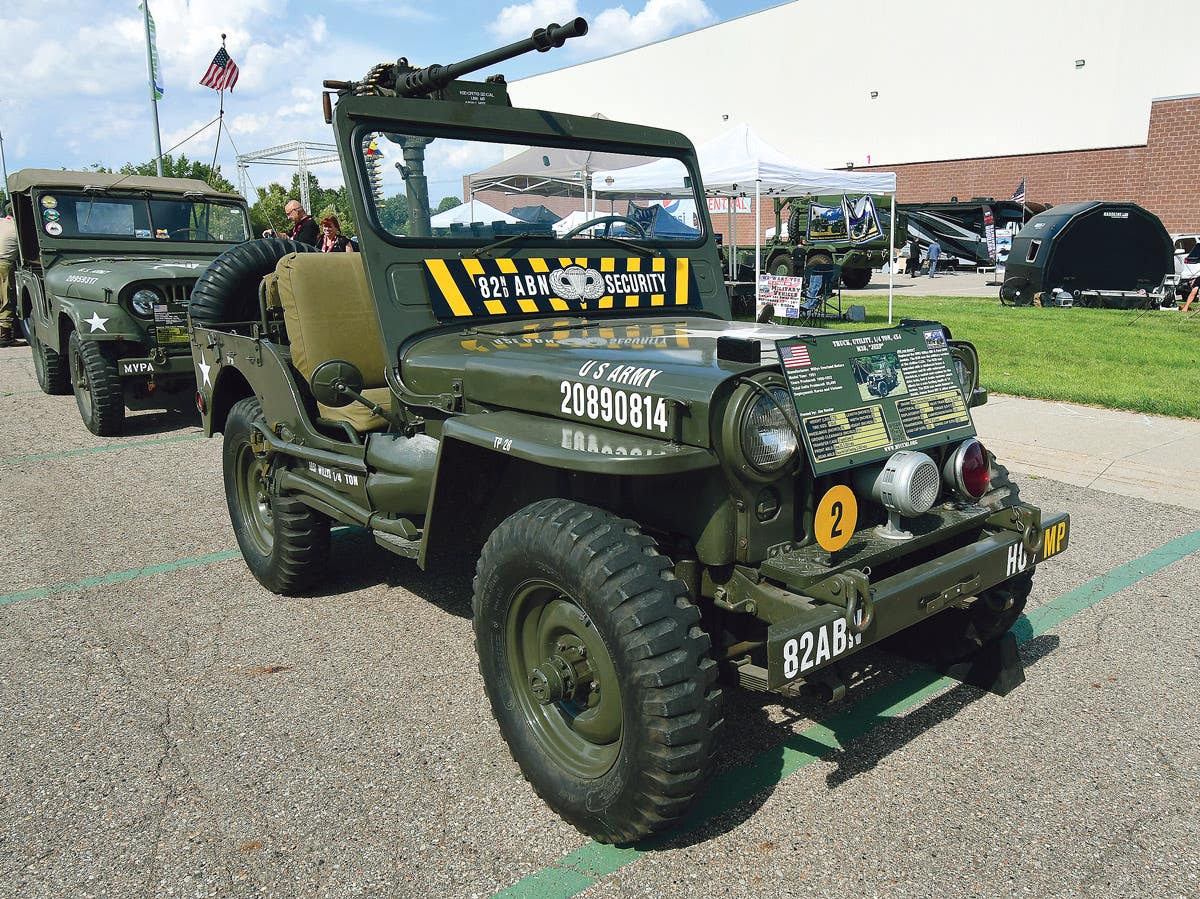
I bought my first military vehicle, a Willys M38 jeep, when I was seventeen and back in the day when jeeps—at least in my area of the country—were so rare that their drivers often smiled and waved at each other when out on the road.
I found the jeep at a local city auction of Street Department vehicles, and got it for what in those days was not an inconsiderable sum of $200. The jeep was completely stock, right down to the M-series ignition switch on the dashboard instead of a key, 24- volt waterproof electrical system, and was still olive-drab with faded white stars.
When picking up my prize, the vehicle maintenance foreman told me the jeep hadn’t been used for anything in the two years since the city had acquired it at a government auction, though it had a CD (Civil Defense) sticker on the hood. Although a former soldier, he had left the Army after WWII but before the advent of M-series vehicles, and didn’t even know how the jeep’s light switch worked. Neither did I, and having no manual (always a good thing to have when buying a military vehicle), I didn’t know about the Service Stop position on the light switch, which got me a warning from a cop to “fix the brake light” on the way home. I later spent almost an hour figuring out how the light switch worked (and almost broke it): One example of how learning from experience can waste a lot of time and possibly cause problems.
Much of what I know today about M-series vehicles in general came from that M38; and I had to learn everything from experience. This not only wasted a lot of time but almost got me stranded in Death Valley, California. While the experience may have been good for me, I often think about how much more I could have enjoyed that jeep if I’d known more about it to begin with. So, here is my version of Military Vehicles 101. Hopefully, it will be of some help to those just buying their first MV.
LESSON 1: LIGHTING, TWO SYSTEMS
Since I began my MV experience by learning about my M38’s lighting system (which was typical of most M-series vehicles) it seems a good a place to start, especially because lights are usually the second thing one needs to know about a vehicle after they get it started. Future articles will cover other MV systems and components, especially those that are unique to military vehicles and which often differ a lot from their civilian counterparts. It may also be helpful to know what some of these components do and how they work.
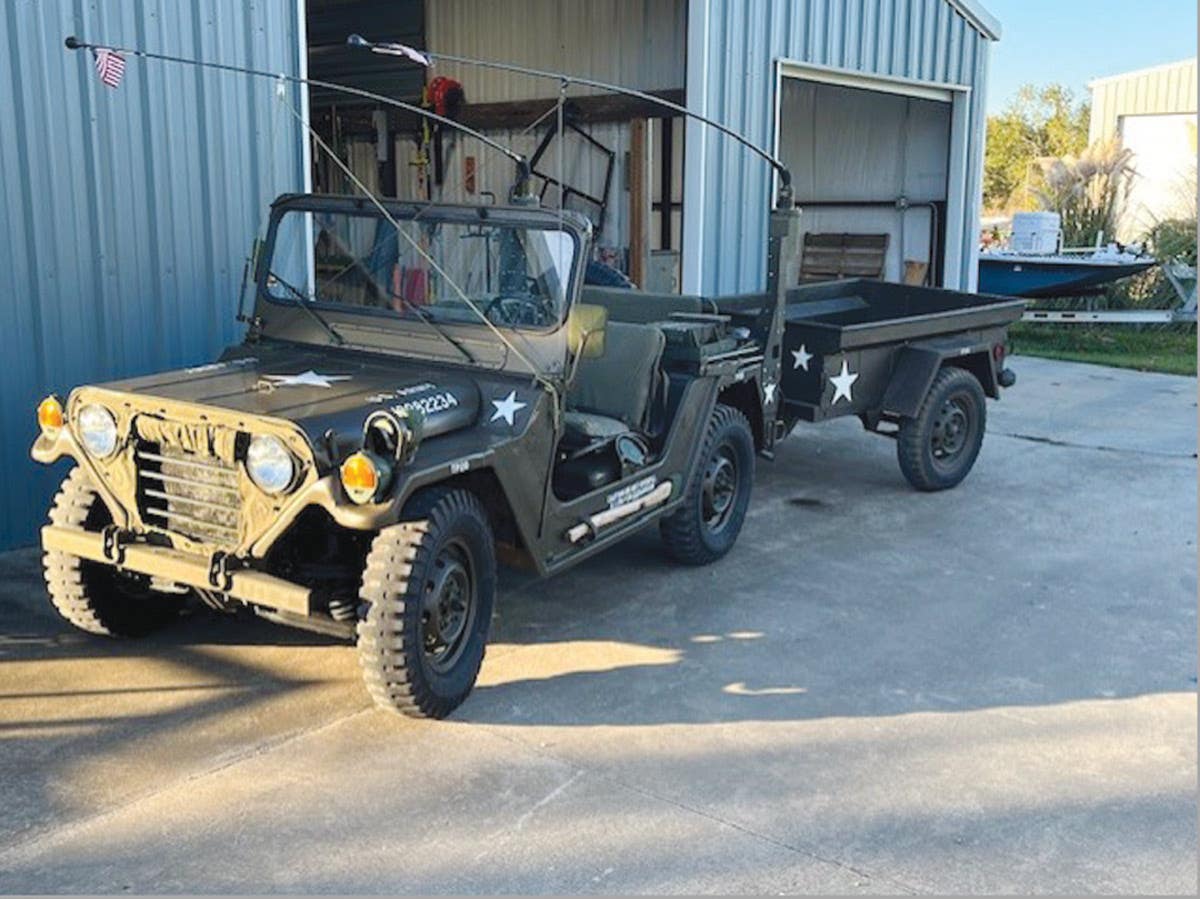
There are two basic types of lighting systems, lamps and switches found on most common U.S. military vehicles in the MV hobby. These are the WWII and the post-war, or M-series, systems, and the latter are still in use today. Although the systems themselves are similar—both having BLACKOUT (BO) marker lights front and rear (sometimes called “convoy lights”), blackout driving headlights (usually one on the left front fender or left front side), and one or two blackout stop lamps in the rear—many of their components and switches are different.
Most military vehicles are also equipped with SERVICE driving lights. These are conventional headlights in front, and one or two tail lamps and stop lamps at the rear. These are used for normal driving just like civilian cars or trucks. Some M-series vehicles also have parking lights in front (my M38 being one exception) and later model vehicles, after around the mid 1960s, were also fitted with turn signals.
As I discovered after getting my M38 home, most common U.S. military vehicles have both a BLACKOUT lighting system and a SERVICE lighting system; and except for very early WWII vehicles, both systems are usually controlled by one switch on the dashboard.
SWITCHES
The most common WWII switch is a push/pull type with a lockout button. The front and rear blackout marker lights come on when the switch knob is pulled out to the first position. Early WWII vehicles were not fitted with blackout driving lights because these lights were still in development, though many vehicles were later retrofitted with these lights—installation kits were issued—and had an additional switch installed for them. Many WWII vehicles also had a separate switch to turn on the instrument panel lights.
Since it could be lethal if a driver accidentally turned on a vehicle’s service headlights at night under combat conditions, the main light switch required that the lockout button be activated before the knob could be pulled out beyond the BLACKOUT position. Likewise, it wouldn’t do to have a vehicle’s service stop lamp come on under combat conditions, so the lockout button also had to be activated to set the switch for the SERVICE STOPLIGHT (or SERV STOP) function.
Probably the most common mistake that new MV owners make is not switching on the service stop light before driving. At best, this may get one stopped by a cop. At worst, it could get one rear-ended. Therefore, it might be wise to leave a prominent note in the cab to always turn on on the service stop lamp until it becomes a habit. Not surprisingly, many such switches were broken, or replaced with civilian switches after the vehicles were retired from military service. NOS or repro switches are available, though the quality of repro switches varies a lot.
Another common mistake is accidently turning on (and leaving on) the blackout marker lights, which will usually run down a vehicle’s battery within twenty-four hours or less. This error is easy to make since it’s almost impossible to tell if these lights are on in the daytime unless one looks right into them from a few inches away. Even at night, they are hard to see unless one is either directly behind or in front of a vehicle.
BLACKOUT LIGHTS: DRIVING IN THE DARK
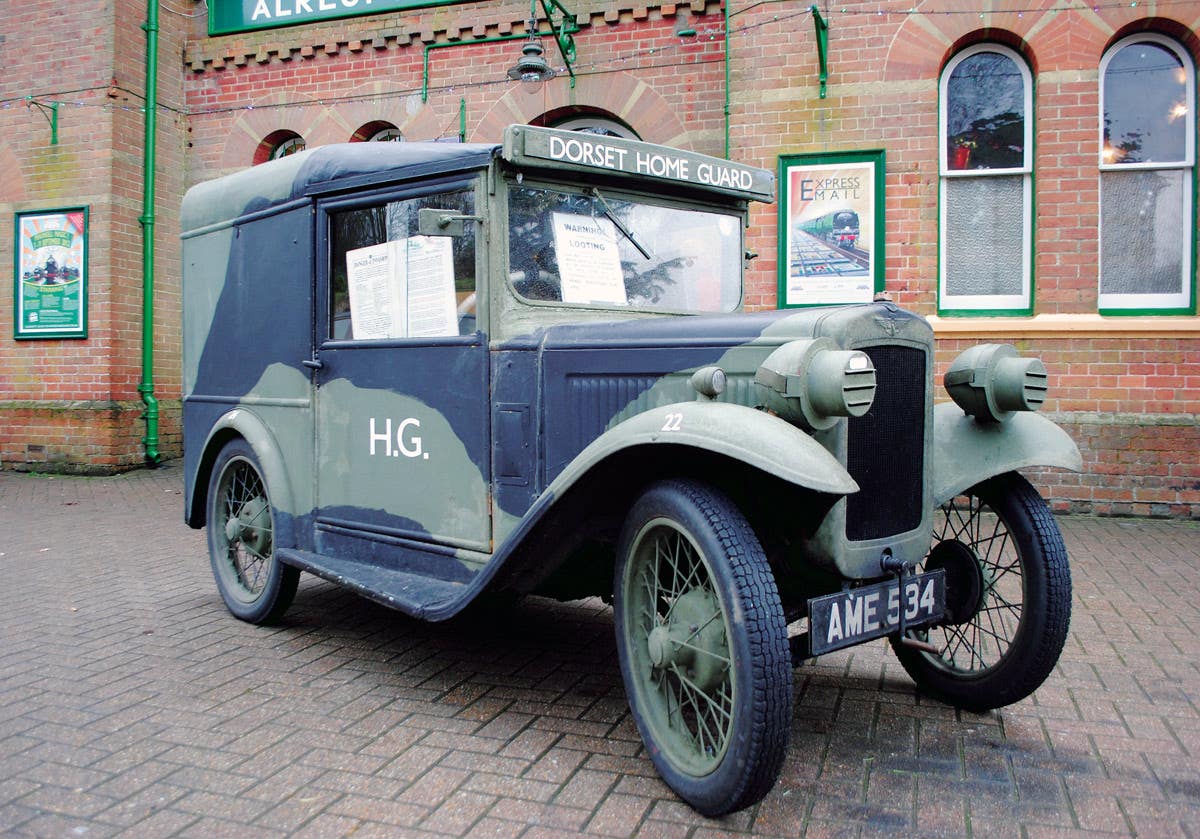
Prior to WWII, most U.S. military vehicles only had civilian type lighting systems, which generally consisted of two headlamps in front and one stop and tail lamp at the rear, and the components varied by vehicle manufacturer. As the rumblings of war grew more ominous, new military vehicle lighting systems were developed and standardized, especially blackout lighting for night operation under combat conditions.
Research was still being done on a blackout driving light when the U.S. entered the war, but most new tactical vehicles were fitted with blackout marker lamps front and rear. The front lamps consisted of small bullet-shaped metal housings with ordinary single-filiment bayonet-base bulbs inside. However, the rectangular lens was filtered to give the light a definite shape and to prevent its glow from being projected upward where an airplane might spot it.
These lights could only be seen from directly in front of the vehicle. They were not for the driver to see by, and they didn’t project any light, which might illuminate a dust cloud from the vehicle ahead in a convoy. Instead, they were only to be seen by a watcher, usually stationed in the back of the vehicle ahead. At more than 60 feet, these lamps showed two single shapes of white, yellow or sometimes bluish light, while at less than 60 feet these two shapes appeared to be four. This indicated to the watcher that the vehicle following his own was getting too close, and he would generally flash a warning with a blackout flashlight.
The blackout marker tail lamps functioned the same way but displayed two red shapes at more than 180 feet, while at between 180 and 60 feet they appeared to be four shapes. At less than 60 feet, they appeared as eight shapes, and the driver of the vehicle following in a convoy would know he was getting too close to the vehicle ahead. An additional red (or sometimes amber or white) shape would flash in the right-hand rear lamp when a vehicle’s brakes were applied: this was the blackout stoplight.
The blackout driving lamp consisted of a sealed-beam unit with a special lens and metal shield which allowed only a thin slit of light to be projected directly ahead of the vehicle. The rays of this light were filtered so they would only illuminate vertical objects, such as trees, fence posts, telephone poles or personnel. A metal visor prevented the light from being spotted by aircraft and also from being projected skyward when the vehicle was climbing a hill.
On early retrofitted WWII systems, the blackout driving light could be used either by itself or in combination with the blackout marker lamps, while on later to present-day systems it can only be used when the marker lamps are already on.
TAILLIGHT ASSEMBLIES
The standardized U.S. WWII type tail lamp assemblies consisted of small sealed units within a stamped sheet-metal housing. The left-hand lamp functioned as service tail and stop light as well as blackout marker, while the right-hand assembly functioned as blackout marker and blackout stop light. The sealed units of both lamps had bayonet type bases and were installed just like light bulbs.
Most WWII MVs had 6-volt electrical systems, but there were also a few with 12, such as some I.H.C. trucks used by the Navy and U.S.M.C., and also radio vehicles such as the 3/4-ton Dodge Carryall. If you own one of these vehicles, you can still find NOS tail lamp sealed units (as well as the blackout driving light) in 12-volt versions. There are also new LED (light-emitting diode) replacements offered by some of the companies that advertise in this magazine.
Although the standardized WWII rear lamp assemblies had sealed light bulb units, the housings were not waterproof. Nor were most WWII light switches and dashboard instruments.
After WWII, the front and rear lamp assemblies were redesigned for M-series vehicles. They were made of cast aluminum, were completely waterproof, and used ordinary 24-volt bayonet-base light bulbs instead of sealed units. They incorporated parking and turn-signal bulbs in the front units, though their function as blackout marker lights remained the same. The primary exceptions were the M38 and M38A1, which retained the WWII style marker lamps in front and had no parking lights. Except for being 24-volt and sometimes made of plastic, the M-series blackout driving lamp was basically the same as those used on WWII vehicles...and remains so to the present day.
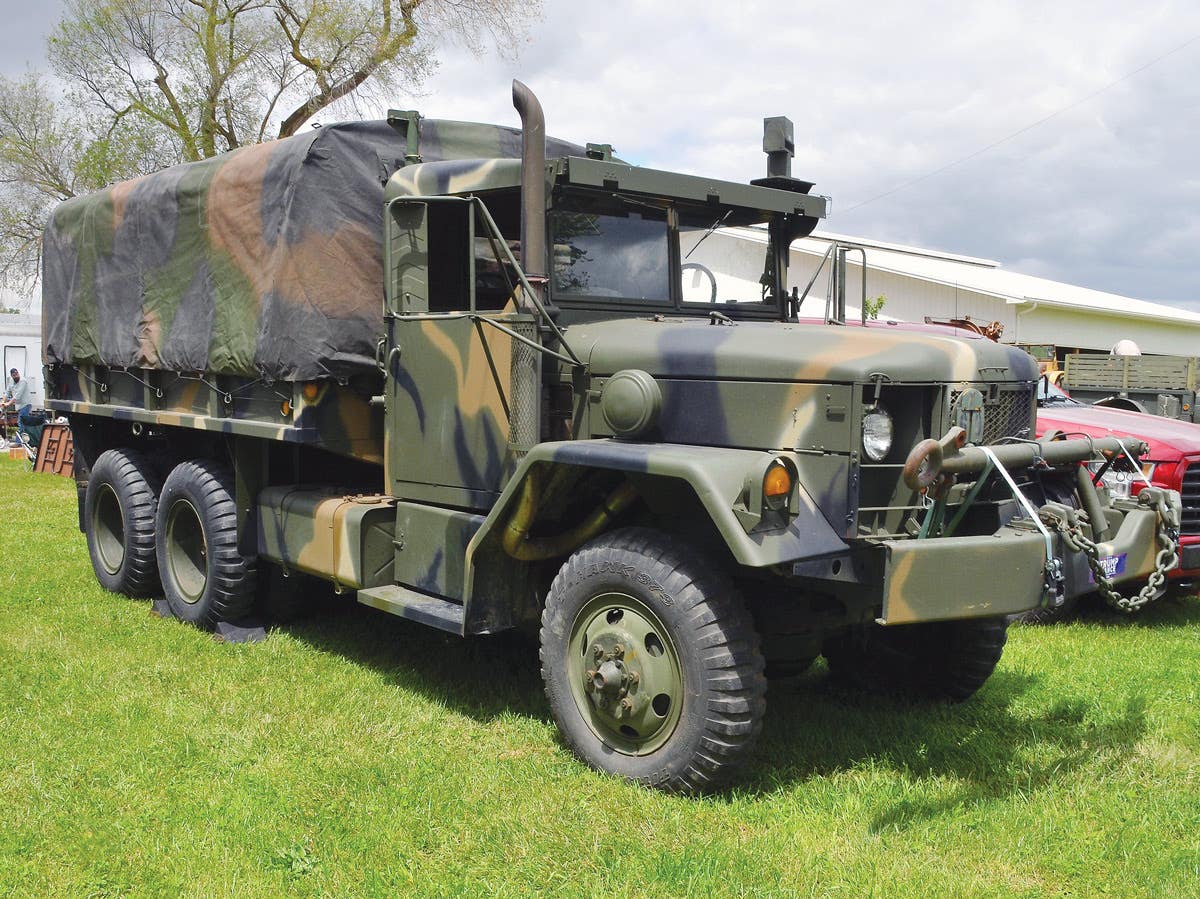
Late and current model M-series lamps, such as those used on the M35A2-3 and HMMWV, are made of plastic and have larger service lenses than their smaller aluminum predecessors. The latest models use LEDs instead of bulbs.
A new and waterproof 3-lever light switch was fitted to M-series vehicles, which, like the WWII models, provided a no-service stoplight position, as well as making it nearly impossible to accidentally turn on the vehicle’s headlights since the lockout lever had to be lifted. Trying to force the other two levers (as I first did so many years ago) without lifting the lockout may break the switch.
Many early M-series vehicles, such as the M38, M37, M35 and M211, still had only one service tail and stoplight like the WWII vehicles; and even though the front lamp units were provided with lenses to accommodate a third bulb for turn-signals, most early M-series vehicles didn’t have turn-signals. Later models did, and so were equipped with two service tail and stop lamps. A separate lamp, reminiscent of the WWII front convoy lamps, was usually mounted above or beside the right-hand tail lamp to provide a blackout stop light. Of course, the turn signal switches and other components were waterproof as are virtually all other M-series vehicle components, and future articles will cover the joys and frustrations of dealing with them.
An often-asked question, both from new MVers and folks one may meet in a parking lot or at an MV event—is, “are those lights good for anything?” This usually means, can they serve any useful civilian purpose? Just for fun I have driven at night using the blackout headlamp—as I’m sure many other MVers have—but except for cruising a desert road under the stars with the windshield down and not using the service headlights, I have yet to find any practical civilian application.
LAMPS AND WIRING COMPONENTS
Except for the sealed units, most WWII MV lamps and wiring components were basically civilian-style, and working on them isn’t much different from working on a civilian car or truck of a similar vintage. However, M-series components are different, and the early aluminum lamp assemblies in particular can often be a battle to service.
Chances are, if these lamps were working when one bought a vehicle, the new owner hasn’t tried to remove the cover or “door.” If not, one may be in for a nasty experience; and what seemed at first a simple job of taking off the door and replacing a bulb can turn into a whole day of rage and frustration. With this in mind, it might be wise to remove the doors from all your vehicle’s lamps and check them out when you have plenty of time instead of waiting for a bulb to burn out.
SERVICING YOUR LAMPS
I wrote a very detailed article on the care and service of these lamps way back in MVM no. 7, but I’m sure that issue is long lost to posterity so here is a short recap (Ed.’s note: Haha, Steve...you are correct, there are no back issues on our dusty shelves).
The most common problem encountered with servicing these lights is that the stainless steel screws have seized-up in the aluminum housing and are very easy to break. Then, because stainless steel is harder than aluminum, the broken shaft is difficult to drill out. In other words, and like most things in life, these screws are lot easier to break than to fix.
To remove the screws, first clean the slots thoroughly because they are usually caked with many layers of paint. Choose a good screwdriver that fits the screw head properly. This is not a test of strength, but rather a test of patience and skill. If the screw starts to turn but then binds up, gently rock it back and forth. One may find that it will give a little more each time until it finally unscrews all the way. It’s helpful to be able to tell the difference between a screw that’s actually unscrewing and one that’s merely twisting and will quickly break! Liquid Wrench or WD-40 seldom works in these cases, but try it anyway.
If the screw is definitely frozen—and at least one will almost always be—try heating the lamp body tab with a small pin-point torch. This will usually expand the surrounding aluminum enough that the screw will come out. Beware that aluminum has a low melting-point, so don’t overdo the heat.
It’s very common to find that even though a lamp may look fine on the outside, its innards are a mess of corrosion, and the bulbs are fused in their sockets. Use care when trying to remove the bulbs or they may shatter and slice fingertips...wear gloves or grip them with a piece of rubber. If the bulbs are hoplessly corroded in their sockets, the best move is to simply break them, then use needle-nose pliers to crush and twist out the base. Then clean the sockets. There are special wire brushes for this purpose and they do a great job.
Spray the sockets and the lamp interiors with WD-40 or a similar product before installing new bulbs, and use grease or anti-seize compound on the screw threads when reinstalling the doors. Painting the lamp interiors flat white will boost their light output a little.
BEST MAINTENANCE? PREVENTATIVE
Other preventative maintenance that should be performed on MV lighting systems are checking all connections and junction points and keeping them clean and tight. On most WWII vehicles, wiring junctions are usually of the civilian type and exposed to the elements. On M-series vehicles, all connections are sealed and supposedly watertight but they still should be checked now and then, and sprayed with WD-40 or a similar product to keep them from corroding.
Blackout lighting systems may seldom be used on civilian-owned MVs, but it is for that reason that their components should be checked and serviced occasionally. Most MV enthusiasts want them to be mission-capable; and “an once of prevention is worth a pound of cure.”